
Keeping a Crawl Space Dry: What Homeowners Need to Know

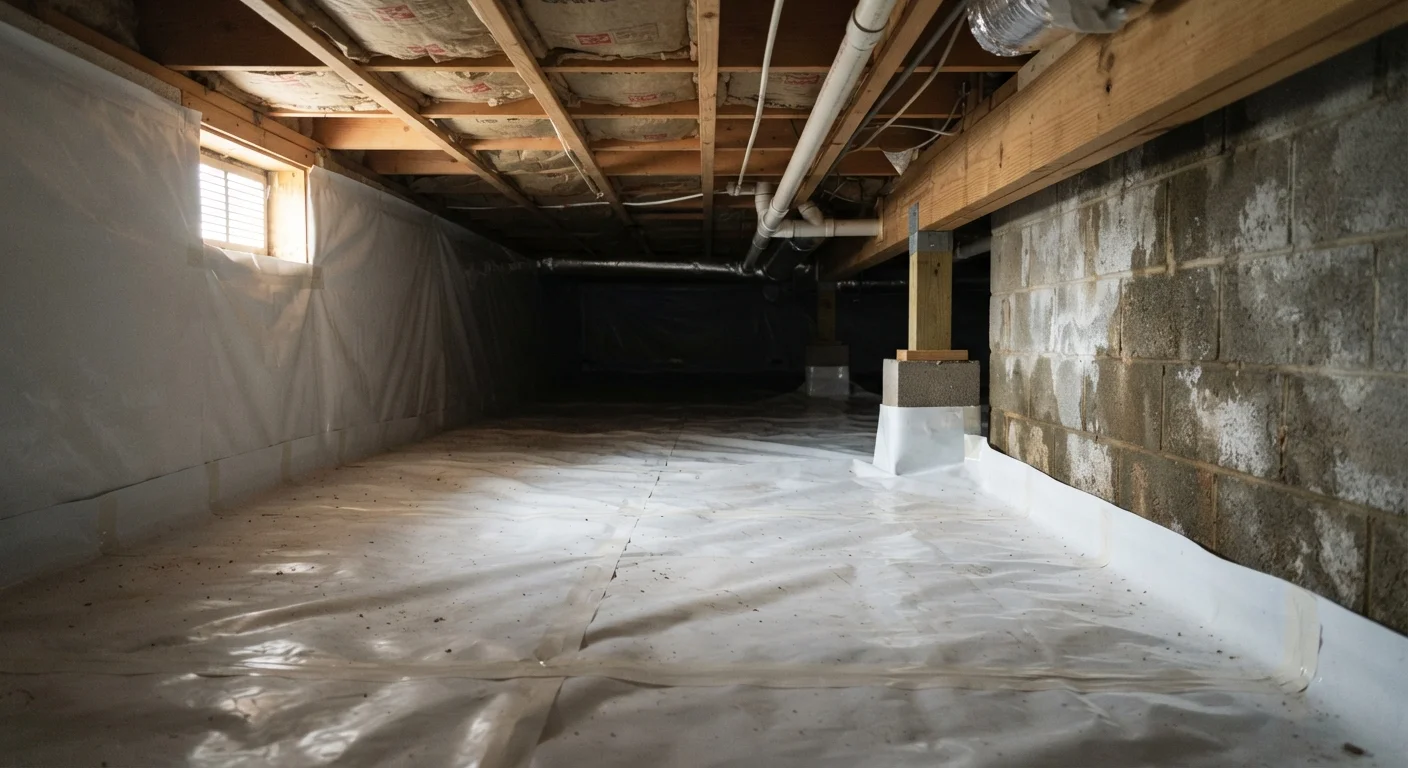
Photo: TargetReads.com | Explore Engaging Reads editorial
Key Takeaways
- Crawl space moisture can lead to mold growth, structural wood rot, and pest infestations if left unaddressed.
- The most common moisture sources are ground evaporation, poor drainage, and inadequate ventilation.
- A polyethylene vapor barrier over bare soil is one of the most accessible DIY moisture-control steps.
- Visible mold, musty odors, and sagging floors are signs that professional assessment may be needed.
- Gutters, downspouts, and proper yard grading play a major role in keeping water away from crawl spaces.
Why Crawl Space Moisture Is a Serious Problem
The crawl space beneath your home may be out of sight, but moisture problems there rarely stay contained. Excess humidity in this enclosed area creates conditions where mold and mildew thrive, wood joists and subflooring begin to rot, and pests — including termites — find an inviting habitat. Over time, these issues can affect your home's structural integrity and indoor air quality.
Because air naturally moves upward through a home (a principle called the "stack effect"), air from the crawl space regularly enters your living areas. That means mold spores, musty odors, and even radon gas can migrate up through flooring gaps into rooms where your family spends time. Addressing crawl space moisture is part of responsible whole-home maintenance — see our annual home maintenance calendar for how it fits into a seasonal upkeep routine.
Common Causes of Crawl Space Moisture
Understanding where moisture comes from is the first step toward fixing it. In most cases, one or more of these sources is responsible:
- Ground evaporation: Bare soil releases water vapor constantly. Without a vapor barrier, this moisture rises directly into the crawl space structure.
- Poor exterior drainage: When gutters are clogged, downspouts discharge too close to the foundation, or yard soil slopes toward the house, rainwater is directed toward — and sometimes into — the crawl space. Our article on grading and drainage explains how soil slope affects water movement near your foundation.
- Inadequate or blocked vents: Vented crawl spaces depend on airflow to carry humid air out. Vents blocked by insulation, debris, or vegetation prevent this.
- Plumbing leaks: Even slow drips from supply lines or drain pipes running through the crawl space can saturate the area over weeks or months.
- Condensation on cold surfaces: In warm, humid weather, cool pipes and concrete walls can cause moisture in the air to condense — much the way window condensation forms on glass.
How to Spot Early Warning Signs
You don't need special equipment for an initial crawl space check — a flashlight, old clothes, and a basic understanding of what to look for are enough. Inspect after heavy rain when problems are most visible.
- Musty or earthy odor rising through floor vents or near exterior foundation walls
- Efflorescence — chalky white mineral deposits on concrete or block walls, indicating water has moved through the material
- Condensation or rust on pipes, metal hangers, or HVAC equipment
- Dark staining or fuzzy growth on wood beams (possible mold)
- Soft, springy, or sagging floors above the crawl space, suggesting rot in the subfloor or joists
- Standing water or consistently damp soil after rain events
Use a Hygrometer to Track Humidity
If you're unsure what you're seeing, photograph the area and share images with a licensed home inspector or contractor before attempting any repairs.
DIY-Friendly Fixes You Can Start With
Several moisture-control measures are accessible to most homeowners without specialized tools or professional licenses:
- Install or improve a vapor barrier. Cover the entire soil floor with a minimum 6-mil polyethylene sheet (10–12 mil is more durable). Overlap seams by at least 12 inches and run edges up the foundation walls, securing with tape or mechanical fasteners. This is one of the highest-impact steps you can take.
- Clear and extend downspouts. Ensure gutter downspouts discharge water at least four to six feet from the foundation. Add extensions if necessary — they're inexpensive and easy to attach.
- Check and clear vents. Make sure crawl space vents are not blocked by insulation, stored items, or overgrown vegetation. Vents should be evenly distributed around the perimeter.
- Fix minor plumbing drips. Tighten compression fittings or replace worn washers on accessible supply lines. For anything involving soldering, pipe replacement, or drain lines, consult a licensed plumber.
- Improve yard grading. Add topsoil along the foundation perimeter to ensure water flows away from — not toward — the house.
Some of these fixes may seem minor, but DIY repairs homeowners often underestimate can carry hidden complexity — read up before diving in.
Permits May Be Required
When to Call a Professional
Some crawl space conditions go beyond what a homeowner should handle alone. Contact a licensed contractor, structural engineer, or certified mold remediation specialist if you encounter:
- Mold covering more than a small, isolated area (generally over 10 square feet is considered a threshold for professional remediation)
- Structural wood rot affecting floor joists, beams, or posts
- Persistent standing water that returns after rain despite improved drainage
- Foundation wall cracks, bowing, or active seepage
- Evidence of significant pest activity, particularly termites or carpenter ants in wood
Full crawl space encapsulation — which involves sealing vents, installing a heavy-duty liner, and sometimes adding a dehumidifier — is another professional-grade solution worth discussing with a contractor if humidity levels remain chronically high despite basic fixes. Note that encapsulation work may require permits depending on your local building codes; always verify requirements with your municipality before work begins.
This article is for general informational purposes only and does not constitute structural, legal, or professional contractor advice. Always verify local permit requirements and consult a licensed professional before undertaking significant home repairs.
Don't Seal Vents Without a Full Plan
Frequently Asked Questions
The content on this site is for informational purposes only and is not a substitute for professional advice. Always consult a qualified professional for guidance specific to your situation.